Avocados are one of my favourite foods, so a few months ago I thought I’d have a go at growing them from seed. After a bit of searching online, I found good advice in a post by Baja Boomer. You have to scroll down to find it on the site, so I’m quoting the post here:
“I’ve grown a lot of them over the years, just because they’re fun. Some I gave away, some I kept as (large) potted trees for the patio. Here’s how I do it:
First, I find that generally speaking I have better success if the avocado has not been refrigerated before I harvest its seed.
I insert 3 toothpicks at even intervals about 1/3 of the way from the top of the seed (the fat part is the bottom, where the roots come out). Place it in a glass or jar of room temp water, with the toothpicks supporting it on the sides of the glass, and keep it in a warm place. (note that if you put it in the sun, the seed will try to photosynthesize and start turning green. I always keep it out of the sun until it starts to grow, but don’t know that that really makes any difference.Sooner or later (depending on the seed), the bottom of the seed will start to split and a root will descend. Sometimes it gets pretty long before additional roots start branching out; that’s OK. Then a shoot will emerge from the top with its 2 little “false” leaves.
I let it keep growing until the glass is pretty full of roots and the shoot is looking strong with several leaves. Then I pot it up in a 6″ clay pot, with the top 1/3 of the seed sticking out of the soil and make sure the soil is watered well. After a few days of letting it get used to being in dirt, I move it to an area that gets morning sun. Too much sun will often burn its leaves at this point; and wind is its enemy. Keep it in a protected spot. Make sure it is well drained, as avocados don’t like wet feet. I water it when the dirt one knuckle down is dry.
Once it is growing strongly and has established a solid root structure (usually close to 2 feet tall), you can put it in a bigger pot or plant it outside. (When I repot, I usually clip the tip of the tap root off to encourage side roots and to keep the tap root from circling round and round the bottom of the pot. You don’t need to do that if you’re planting it in the ground.) I never try to remove the seed until it has shriveled up on its own, which might be a year or more. The plant actually is still using it for food, and if you remove it too soon you can kill the tree.
I haven’t had one die on me yet, so I must be doing something right. 🙂
Thanks Baja Boomer! I just have a couple of comments based on my experience. First of all, it didn’t really matter if the avocado had been refrigerated or not, but what I have found is that if a seed is already split when you cut open the avocado, there is a good chance that you’ll get a seedling from it. As you’ll see from my photos, I ended up using four toothpicks not three – four seemed to provide more stability.
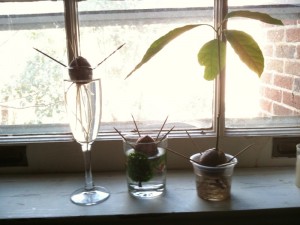
In this photo, you can see my baby plantation. The two seeds that have sprouted had both split already. The seed in the middle – started before the baby on the left – hadn’t, and I’m still waiting… (Update in February 2011: that middle seed eventually split, and is now pushing out a very healthy-looking root. So hang on in there… These seeds can take three months or more to wake up and start growing.) And don’t worry, I have other champagne flutes, which will be pressed into service when I close on the land (mid January now, we hope!)
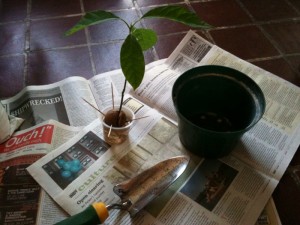
Today I finally got around to potting on the oldest seedling. As per instructions, I waited till it had a few leaves, and a decent root structure. I think the pot I chose for it is about 6″, but it isn’t clay. I’m using what I had to hand, a recycled plastic pot. I also chose to cut off the wooden toothpicks, rather than try to pull them out, and risk breaking apart the seed. It’ll be quite an adjustment for that root system to expand into its new home. Fingers crossed I don’t mess up with the new watering routine; and I should move it as well now from the hatchery, which is a north-facing kitchen window.
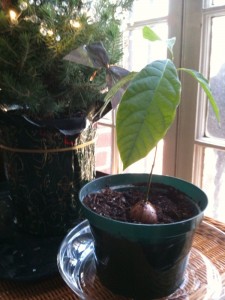
And here’s the newly rehoused seedling with a festive companion. Here’s hoping they both make it to a spot on my land!
